}
Showing posts with label furniture projects. Show all posts

Wednesday, June 27, 2012

Magnetic Burlap Memo Board


I got this piece at a garage sale for $1.  Originally it was a mirror and I was intending to keep it that way.  Until I got it into the trunk of my car and realized that some of the mirror “treatment” was flaking off.   Here is the before shot.  

And here you can see the detail of where the mirror was flaking off.   


I saw it and immediately thought I had just spent one dollar on trash.  I’d just have to throw it away when I got home.  One for the “lesson learned” file.  

Well, somewhere between then and now I had a brilliant idea.  Why not try to take the mirror out and see if I can still use this cool frame for another purpose?  I thought about making it into a chalkboard, but had done a chalkboard recently and thought I should try something else.  When I went to the flea market a couple weeks ago I picked up some great burlap sacks (which I forgot to picture on that post).  I was thinking of using them for another project – and still am – but I thought about this frame that I didn’t know what to do with and it came to me to make a burlap memo board.  


After I took out the mirror, I painted the frame with Annie Sloan Chalk Paint in Emperor's Silk (red).  Then I painted over that in a light pink ASCP color, Antoinette.  Once the red color was totally covered and the paint was dry, I used a damp rag to rub off some of the pink paint in places.  It is a fun way of distressing that I've really enjoyed the most, I think.  It gives me freedom to make it look the way I want and I don't get a ton of "scratch" marks from using sand paper.


At first I was going to make it a cork board and use push pins, but I’ve never been a huge fan of push pins, so I decided to make it magnetic.  I bought a piece of sheet metal from The Home Depot and laid the burlap over it, but you could see the metal through it.  After wracking my brain, I came up with an idea.  We have these old, ugly, faded pillowcases on our guest bed that I absolutely hate, but haven’t been willing to replace.  Well, they just so happen to be the perfect color.  So, I cut one of the pillowcases in half and glued the sheet metal to it (which I had already glued to a piece of foam board to help stabilize it) and then wrapped the burlap around the whole thing and glued that down.  


 Now you can’t see the metal and you can’t even tell that there is that thin piece of fabric behind the burlap.  AND, it’s not too thick that magnets won’t stick to it, which is what I was nervous about.  I am not selling this piece (unless someone is REALLY interested in it).  It is going in my daughter’s room which we are slowly changing over from a nursery to a big girl room.  This is the jumping off point along with the pillow I shared with you last week.  I think the memo board looks a little out of place where it is now, but I am not really sure how we're going to arrange the furniture once we're all done and I wanted to get this on  the wall now.  So, there it hangs...for now!


Thanks again for stopping by the blog today.  Sorry about such a long post!  I feel like I want to share my steps and thought process behind the pieces I create, but I don't want my readers to be bored by a long, dragged out post.  So, what do you think?  Should I keep my posts short and sweet or do you like me to explain what's going on in my head?!  Please leave me a comment with YOUR thoughts...and be honest.  I can take it!  :)


I'm linking up to the following blogs to share my project!

Cherished Bliss - Craft and Tell
Today's Creative Blog - Get Your Craft On
Domestically Speaking - The Power of Paint Party
{Primp} - Primp Your Stuff Wednesday
Embracing Change - Creative Inspirations
Restore Interiors - Restored it Wednesday
Liz Marie Blog - Link Up With Me, Liz Marie
House of Hepworths - Hookin Up With HoH
Freckled Laundry - {air your laundry friday} Textile Party
The Shabby Creek Cottage - Transformation Thursday
Miss Mustard Seed - Furniture Feature Friday
Tatertots and Jello - Weekend Wrap Up Party

Sunday, June 24, 2012

Two tiered end table

I’m so excited to share this table with you!  


It was looking pretty shabby when I picked it up at a garage sale a month ago.


The top really needed some help!


I am really loving the look of a stained top and try to do it on all the pieces with tops that are in good enough shape.  I think it lets the piece keep some of it’s previous life and still get a fun makeover!  For this piece, I used Dark Walnut stain by Minwax, the same stain I used for my first painting project.
I absolutely love the color!


The body of this table is done in Provence, an Annie Sloan Chalk Paint color.  It is such a fun color.  Very vibrant and cheery!


I also tried a new technique on this piece!  I taped off stripes on the drawer and dry brushed them in Old White by Annie Sloan.  It was my first time ever attempting dry brushing and I really like the way it turned out. 


I’m really starting to enjoy taking more risks and trying new things when I refinish these pieces.  I feel like it gives the pieces more personality than just being painted one color and doing nothing else with it.  I’m having fun with it and I feel more and more creative the more I use my creativity!  I love it!

Thanks for stopping by and checking out my latest project!  I'm still working on finding a way to sell my painted furniture, but once I figure that out, this piece will be for sale...or you can always contact me if you are interested in it.


I'm linking up to the following blogs to share my project!

Today's Creative Blog - Get Your Craft On
Domestically Speaking - The Power of Paint Party
{Primp} - Primp Your Stuff Wednesday
Embracing Change - Creative Inspirations
Restore Interiors - Restored it Wednesday
Liz Marie Blog - Link Up With Me, Liz Marie
House of Hepworths - Hookin Up With HoH
The Shabby Creek Cottage - Transformation Thursday
Miss Mustard Seed - Furniture Feature Friday
Tatertots and Jello - Weekend Wrap Up Party

Sunday, June 17, 2012

My first custom order … more yellow!


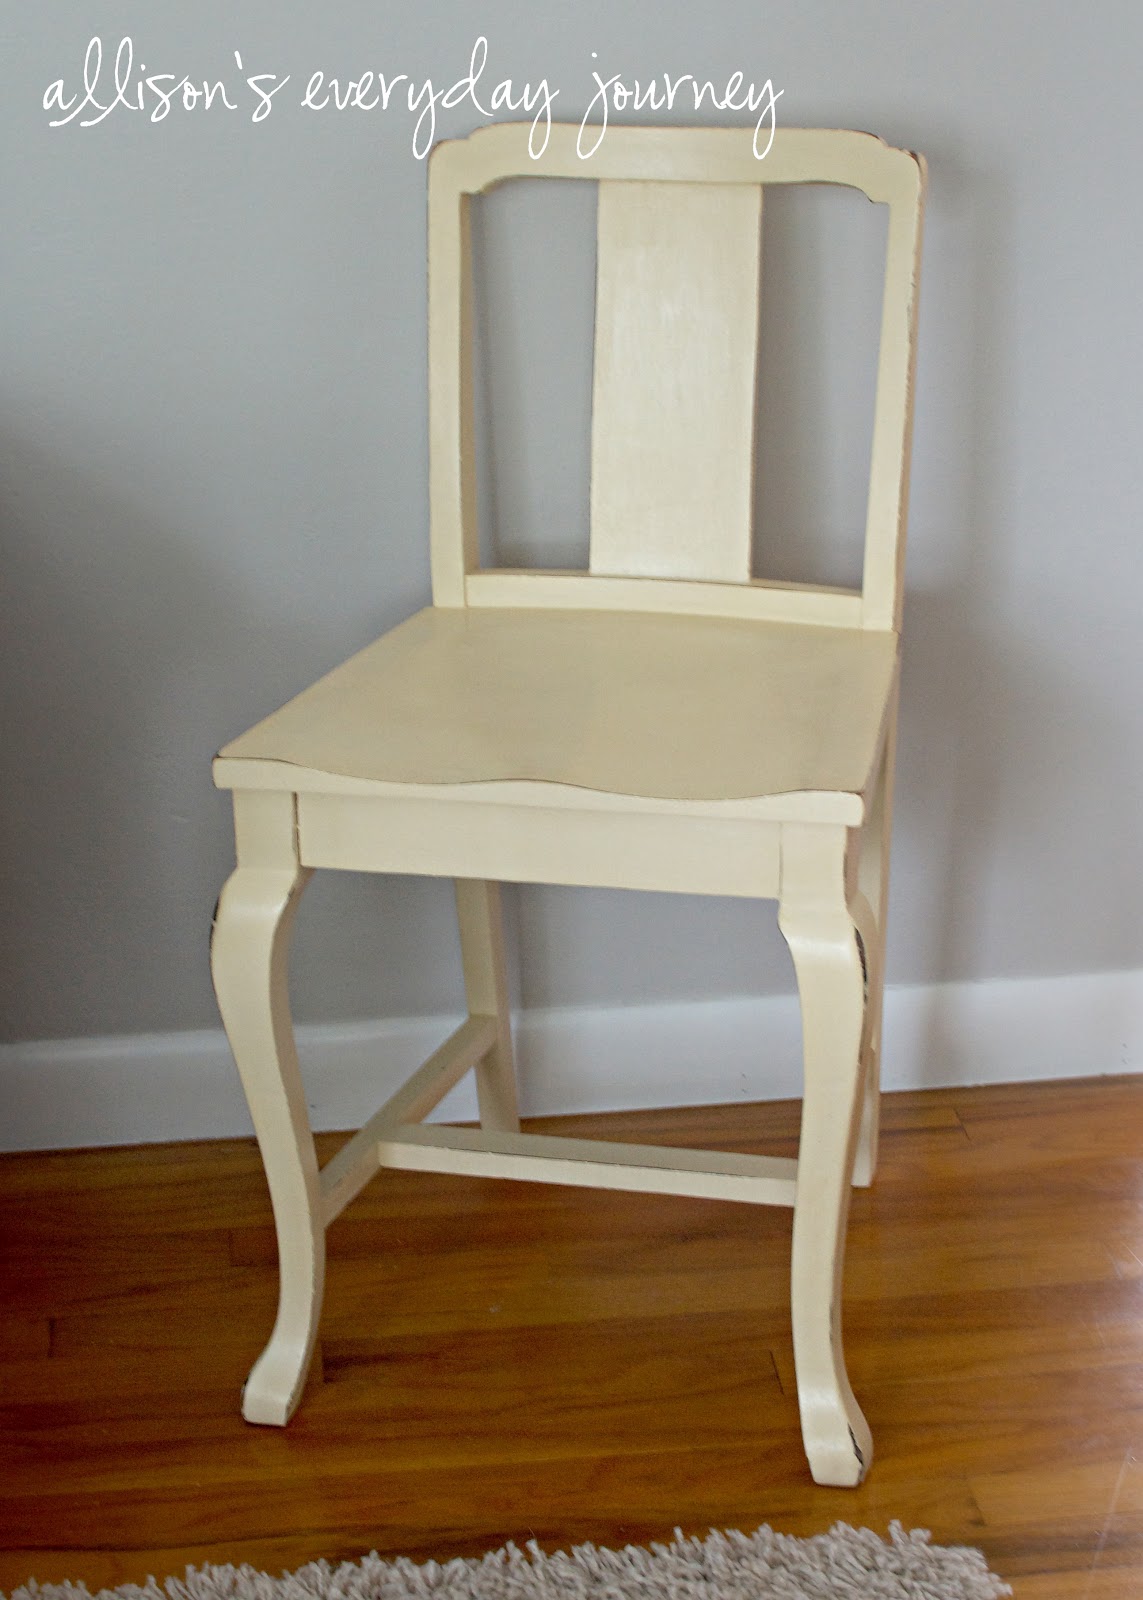
If you remember my post about my flea market finds, you’ll remember this chair I found that day.  

While looking at the furniture in this particular booth, I found a chair I liked and considered buying, but I kept looking through the booth at the rest of the furniture for sale.  When I saw this beauty I fell in love with it.  It has so much character – much more than the first chair I had looked at and consequently passed on.  The legs on this chair are just so cute.  I knew I had to have it.  I asked the man selling it if he’d accept $10 less than the ticketed price and, to my surprise, he said yes!  I thought he’d haggle with me, but he just said yes!  I handed over my money and that baby was mine!
As I walked out of the booth with my new treasure tucked under my arm, my mother-in-law says “Would you be willing to paint that chair and sell it to me?”  Talk about an easy sale!  I was originally planning on painting and selling the chair anyway (although I’m still in search of a shop in which to sell my painted furniture), so the fact that I “sold” it 30 seconds after I bought it made me quite happy!  I showed my mother-in-law the Annie Sloan Chalk Paint colors and let her pick out which ever color she wanted.  She really liked Cream, so we went with that.  After some paint, a little distressing, and clear wax, it is ready to go to its new home! 


I love this chair and wish I had a place for it in my own home, it’s just so darn cute!  But, I suppose I can “visit” it at my in-laws’ house whenever I want!  ;)
Thanks for stopping by my blog to check out my latest project.
Hope you have a wonderful week!


I'm linking up to the following blogs to share my project!


Today's Creative Blog - Get Your Craft On
Domestically Speaking - The Power of Paint Party
Embracing Change - Creative Inspirations
Restore Interiors - Restored it Wednesday
Liz Marie Blog - Link Up With Me, Liz Marie
House of Hepworths - Hookin Up With HoH
The Shabby Creek Cottage - Transformation Thursday
Miss Mustard Seed - Furniture Feature Friday
Tatertots and Jello - Weekend Wrap Up Party

Wednesday, May 30, 2012

Fun take on an inspiration board...

A few weeks back I shared with you my free garage sale crib spring find.  I had seen this project and had been keeping my eyes open for a spring, but never thought I’d find one...and for free at that!  

This project was SUPER easy and didn’t take long to complete.  I won’t give you a tutorial here because it wasn’t my idea...and I’m not into stealing more creative people’s ideas and pretending they’re my own.  I loved this project so much that I knew I wanted it in my own home, but I didn’t really change anything from the original because it was so cool nothing needed to be changed!  :)  So...make sure you head over to The Handmade Home and check out her tutorial...and her great blog while you’re at it!  :)

The inspiration board is above my computer in my office and I'm going to be using it for personal things like cards and pictures (as shown in these photos), but also for anything that might inspire me in interior design and/or furniture painting.  I'm so excited to have a place for all of my inspiration instead of scattered all over my desk!


Oh, and sorry about the weird fading on the pictures.  It has something to do with the way the light comes in my window, but I'm not sure how to fix that.  I'm just a beginner photographer, ya know?!  ;)

Hope you’re all having a wonderful week!  So glad the weather is starting to cool back down here in Michigan!  I’ve got a lot of projects in the middle stages of completion and I’ll be blogging about them as I get them done.

Friday, May 25, 2012

Yellow end table : The little table that could

I’m so excited to share my end table makeover with you!  You saw this shot of it in my living room update post, but I wanted to share a few before and after shots with you today.


This end table started out very sad and run down.  It looked like it had been painted by someone for their daughter’s bedroom.  It had butterflies, flowers, ...and crayon marks!  It really had seen better days and when I bought it, I was determined to give it new life.  Little did I know, it would take a lot of lovin’ to get this piece back to a happy place.  


First I stripped the paint off the whole table.  The paint was quite uneven on the table and I thought I’d better just strip it rather than sand it down.  Here’s a shot of me taking the stripper off of the top.  


I, in all of my beginner “wisdom”, figured the paint would strip off of the table the same way as it did on my nightstand top and all would be well with the world; I’d paint the table and be done.  Well, it didn’t work quite that way.  When I took the stripper off, there wasn’t wood underneath, there was this weird laminate or whatever that blue stuff is.  I figured it wasn’t that big of a deal since it was smooth, but once I got to the sides of the table all hell broke loose!  The sides were covered with press board and they started just basically disintegrating when I took the stripper off.  It got even worse when I tried to sand the surface smooth.  It was an absolute disaster and several times I debated just giving up and moving on.  But part of me wanted to see if I could actually make this work somehow.

My husband suggested covering the sides with a wood veneer so that it would be a smooth surface to work with that we knew wouldn’t fall apart.  We tried it on the sides (and he also added it to the inside of the back panel to cover up that hole you can see in the before picture) and it worked out really well.  He primed the whole table and once the primer was dry, I realized there were bubbles in the veneer!  Grrr!!  By this point I HATED this table and just wanted to throw it in the trash!  I was so over all the problems it was giving me.  But, obviously, I pushed through and was still curious if it could actually work out.  So I popped a few tiny holes in the veneer, filled the holes with glue, clamped them down and then filled the holes with wood filler once the glue was dry.  I also filled in the little dent on the top of the table with wood filler.  Once I got those spots sanded down it was finally ready for paint.  I don't have any pictures of this whole ordeal because I was so upset and embarrassed that I thought I'd just sweep this whole thing under the rug and not tell anyone about it if it didn't turn out!  Haha!


Maybe in hindsight, I wouldn’t have stripped the paint off the table and would have just sanded it down.  But I had no idea this would have happened, so I never would have known.  This experience makes me a little leary of buying painted furniture in the future (to refinish/paint) because I can’t actually see what’s underneath the paint.  I haven’t bought any painted furniture since, but I’m sure I will again...I’m just going to have to really love it!

I knew I wanted to try out some of my new Annie Sloan Chalk Paint on this table because of all the varying surface types.  I had heard that ASCP covers tons of different surfaces including stained wood, painted wood, metal, leather, and new wood, so this was the perfect test to see how this paint actually held up to three different surfaces on one piece.  I was hoping the chalk paint would help everything look cohesive once I was finished.  I mixed up one part Arles and four parts Old White to make this color and when I compared it to my ASCP color chart, it is almost identical to her Cream color.  So now I know, if I want to create this color again I can just buy the Cream color instead of having to do all that mixing!  And for an extra little surprise, I painted the inside of the drawer Duck Egg Blue.

And here it is...the finished end table in all of it's glory!


I still wasn’t sure about this piece until I got it totally painted, waxed, and buffed.  Every step of the way I was unsure about if I could really pull this off and makeover this piece.  I’m SO happy I persevered and didn’t give up on this piece.  I absolutley love how it turned out!  I obviously didn’t do any distressing this time.  I was not about to take any chances with having the blue show through on the top or having anything else go wrong!
The table now sits in my newly painted living room and I must say - I love it!  I’m just so happy with it, maybe partly because it is such a pretty, happy yellow color!

I'm linking up to the following blogs to share my project!


Today's Creative Blog - Get Your Craft On
Domestically Speaking - The Power of Paint Party
{Primp} - Primp Your Stuff Wednesday
Restore Interiors - Restored it Wednesday
House of Hepworths - Hookin Up With HoH
The Shabby Creek Cottage - Transformation Thursday
Miss Mustard Seed - Furniture Feature Friday
Tatertots and Jello - Weekend Wrap Up Party

Tuesday, May 1, 2012

A painted nightstand...and my new venture


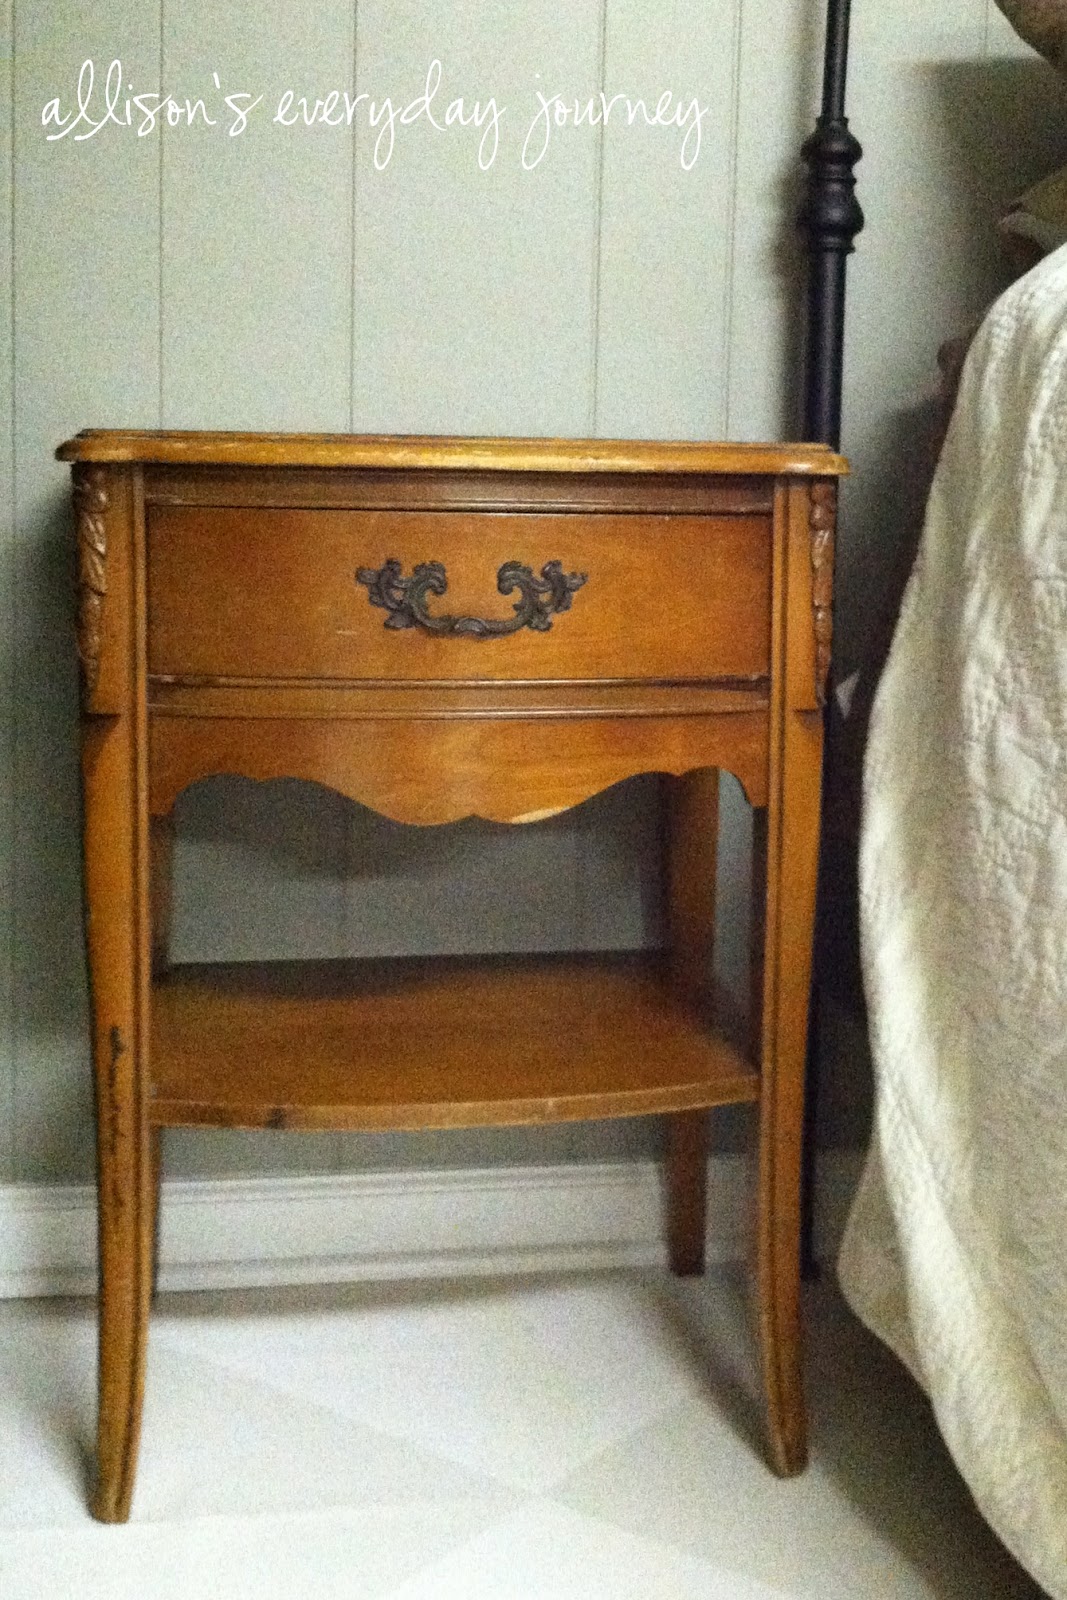
I’m so excited to share my nightstand with you!  I got this baby off Craigslist for $25 and was super excited about it!  It was my first time buying anything off Craigslist and it went really well, actually.  When I bought the nightstand, I really didn’t have a place for it in our home.  I knew I wanted something old and I wanted a piece I could paint/refinish.  I just started cruising Craigslist and found this beauty and thought it would be a fun piece to start on.  When I got it home, I tried it out in different places and finally ended up putting it next to the guest bed in the basement.  My mother-in-law kept telling me we needed a nightstand down there every time she spent the night, so I thought this would do the trick.  And, for $25, plus a few supplies to refinish it, it cost less and has much more personality and detail than anything I could have bought at a chain store.

before 
(sorry about the quality of this photo - it was taken with my phone)

after


I knew before I bought it that I wanted to do a stained top and paint the rest of the piece.  I had seen that look over on Miss Mustard Seed’s blog and thought it looked so sharp.  Since this is the first piece I’ve ever painted - well, besides spray painting - I was a little nervous and didn't know where to start.  I had heard a LOT about Annie Sloan Chalk Paint and really wanted to try it, but wasn’t ready to commit to the high price tag yet.  And my husband REALLY wasn’t ready!  ;)  So, my husband went searching all over the ‘net to see if there was a “better way” and found a recipe to make your own chalk paint.  To make it, you use 1 part Plaster of Paris and 2 parts latex paint.  The homemade chalk paint turned out pretty well, but I’m not sure I love it.  I really want to buy a quart or a few sample pots of ASCP to see how it works and compare it to the homemade chalk paint I made.  From what I’ve been reading, I’m going to assume that  the ASCP is far superior to my homemade chalk paint.  I guess I just need to save up a little money and just go for it.  And ya know what?  If I hate it, I can just try something else.  I know I can just use latex paint, but I've been hearing so much about ASCP, I can't get it out of my head!
I was excited to start on my project, but wasn’t sure how I would like it once I got going on it.  It is a lot of work at times, but I found that the painting, distressing, waxing was such a stress reliever for me.  It gave me time to be alone with my thoughts and I could even let my creativity out a little bit.  I’ve had a hard time separating myself from being a mom since I had my daughter and I found (so far, at least) that painting is something that can give me that separation.  Not that I don’t want to be a mom, I just need to be Allison, the person, sometimes!  I need some time to be able to think about things other than sippy cups and potty training!

This painting project brings me to my new venture I want to share with you.  I have decided to start buying and refinishing/painting antique furniture.  I have always loved the look of antique furniture when done in a tasteful way.  I love the look of an updated home with a few gorgeous antique pieces thrown in there to spice it up a little.  Heck, I would LOVE to live in an old farmhouse, renovate it and have antique furniture tastefully strewn about the home.  But that is only in my dreams since I’m pretty sure my hubby doesn’t share those same thoughts!  Oh well, maybe one day I'll change his mind!  Anyway, I want to start refinishing pieces for my home that will have a purpose and meaning for my home and family.  Eventually I would love to start selling my pieces and be able to contribute to the family income - being a stay at home mom - while doing something I love at the same time.  I don’t know what this will look like for me in the future.  Selling my pieces in an antique store?  Selling pieces online?  Doing custom orders?  I have no idea, but I’m open to just about anything right now!  So, I’ll be researching a lot more.  Colors and finishes I like.  Styles of furniture I want to focus on - good thing I saved my furniture book from college when I was going to be an interior designer!  I knew I should hang on to that book for a reason.  I kept taking it with us when we would move to different houses.  I felt like God was telling me to just keep it, that it may come in handy someday.  Well, maybe this is why He had me hang on to it.  Now I just need a larger vehicle so I can buy bigger pieces of furniture!  ;)
Thanks so much for checking out my new project!  Feel free to leave a comment if you have any questions.  

* Update:  I forgot to tell you ... I used Sherwin Williams Versatile Gray on the body and Minwax Dark Walnut stain on the top.

I'm linking up to the following blogs to share my project!  (This is my first time "linking up" anywhere...we'll see how it goes!)

Today's Creative Blog - Get Your Craft On
{Primp} - Primp Your Stuff Wednesday
House of Hepworths - Hookin Up With HoH
Miss Mustard Seed - Furniture Feature Friday
Tatertots and Jello - Weekend Wrap Up Party

Saturday, November 12, 2011

Project number one ... and what I learned


Well, we’ve moved into our new-to-us house!  We are so excited to no longer be renting!  Although we rented a great house, for a great price, we were definitely ready to be homeowners again.  There is just something about owning a home that you can take pride in.  And, having a couple design/decorating bones in my body, I am thrilled at the fact that we can do whatever we want to this house!  We can paint the rooms, rip up the carpet, renovate the bathroom.  Whatever we want to do, it’s up to us!  
Which leads me to my first project.  Project number one!  I have been so excited to move into our own home the past month or so.  I had been collecting pictures online of design ideas that I liked enough to somehow implement in our new home.  I was armed and ready!  And then I got here.  And the fear set in.  What if I do something wrong?  What if visitors don’t like my “improvements”?  What if I don’t like my “improvements”?  I was paralyzed with fear.  And, with all the projects I had in my little brain, I did NOT know where to start!  I was feeling overwhelmed and scared.  Mind you, we’ve only been moved in for a week now, but I am just so anxious for this place to feel like “us”.
This weekend I bought a chair that would be my jumping off point.  I was so excited when I saw it.  I thought “I can do something with that!”  My husband’s family was in town to see us this weekend and we decided to check out Repurpose, an amazing reclaimed antiques/consignment store located in downtown Northville, MI owned by Cari Cucksey of HGTV’s “Cash & Cari”.  We loved looking around the store!  It was so cool to see it in real life since I had seen it on tv!  We didn’t find anything to buy there, but we did notice that Cari was having a sale at her warehouse in Canton, so we decided to take a little drive over there and see what we could find.  And, that’s where my first project and I met!  And, I got to meet Cari!  Well, I didn’t actually introduce myself and say hi, but I saw her!  (Must work on that shyness!!)  Anyway, I got the chair home and immediately wanted to work on it.  But since we had company, we had to wait a day!  GASP!!  :)  My husband, daughter, and I went out to the fabric store the next day and picked one fabric after narrowing the hundreds of patterns down to three.  Once we picked out the fabric, it was off to get paint.  I wanted to keep it simple, since this was to be my FIRST project, so we just went with spray paint.  And the fear set in again!  I was stuck!  I stood there in front of the plethora of spray paint colors, just staring.  I couldn’t do it.  I had my fabric in front of me so I could match or at least coordinate a color, but I just didn’t know what direction to go!  Thank goodness my husband was there!  He was able to calm me down and remind me that I can do it over if I get it wrong the first time.  And, guess what?  I did get it wrong!  I picked out a light gray color that day and later that night, once I had seen the fabric, chair, and paint all sitting nicely together, I decided that I wanted something different.  So, back to the store we went.  Well, I decided on DARK gray (I know, not a huge difference!) that actually has a little bit of a steel blue tint to it, and I am really liking the end result!  It is not as “crazy” as I thought I would have ended up with, but I love it just the same.  Okay, so I went a little safe with the choices, but at least I made decisions and completed the project!


Now, for what I learned from this experience!

  1. I learned not to use spray paint below 50 degrees!  I primed the chair (after giving it a good sanding) just before the sun went down, and it was just too cold.  The primer didn’t come out of the can worth crap and it was SO frustrating!  I actually came inside pouting to my husband and swearing that I’m no good at anything!  (Yeah, there was a minor meltdown there!)  But he told me that it was probably the temperature outside and not to worry.  So, I ended my painting efforts for the night and moved on to the reupholstery...much warmer!  :)
  2. When cutting foam for your padded seat, make sure to cut it evenly and straight!  I cut my foam with a scissors, not really thinking that it would matter if the edges were a little tattered.  Well, I was wrong!  When I stretched the fabric over the foam, I could see that it was uneven.  You can’t really tell by looking at the chair now, unless I pointed it out, but it annoys me, since I know it’s there!  I’m not really sure how I am going to improve this for my future uses, but I have read a couple ideas online.  One is to use a straight edge (scrap wood or a ruler) and a razor blade.  Another idea is to use an electric knife.  We’ll see by trial and error which I like better...or if I find another idea in the process.
  3. When doing your first reupholstering project, be sure to pay attention to how it was done the first time.  If you like how it looked, it is good to imitate that “style” as best you can.  Then you have an idea of what to do.  Doing that really helped me decide how far staples should be apart and how to fold corners, etc.  It really made me feel more confident about what I was doing!

I hope you all enjoy my little project and maybe even get inspired to do a project of your own!
Finishes/materials used:
fabric: “HS Strobe” / Strobe Citron/Grey - Home Seasons 
paint:  Rust-oleum Painter’s Touch Ultra Cover Gloss dark gray