Just a quick post from me tonight. I wanted to share this recipe that I made for Thanksgiving tomorrow. We are visiting with my dad, brother, and half-sister on Thanksgiving, but we are just having dessert and keeping it casual. I’m super excited because I don’t get to see that part of my family very often and I love dessert! Win win! ;)
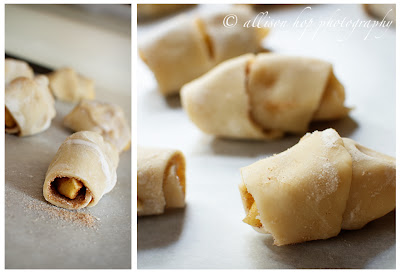
I volunteered to make the desserts since I’m kind of into baking these days (crazy, I know!). These bite sized apple pies are one of the desserts I made. I tried these a month or so ago and really liked them, so I thought they’d be fun to make again. AND...they are super easy to make! Way easier than a whole apple pie! (I would assume...never made one before!) I got the recipe from Taste of Home and followed it exactly.
Bite-Size Apple Pies
Ingredients
- 1/2 cup sugar
- 2 tsp. ground cinnamon
- 1 pkg. (14.1 oz.) refrigerated pie pastry
- 3 Tbsp. butter, divided, melted
- 2 medium tart apples, each cut into 8 wedges
Instructions
- In a small bowl, combine sugar and cinnamon; set aside 1 Tbsp. On a lightly floured surface, unroll pastry. Brush with 2 Tbsp. butter; sprinkle with remaining sugar mixture.
- Cut each sheet into eight 1-in. strips, about 8 in. long. Wrap one strip around each apple wedge, placing sugared side of pastry against the apple.
- Place on parchment paper-lined baking sheet. Brush tops with remaining butter; sprinkle with reserved sugar mixture. Bake at 425° for 13-15 minutes or until pastry is golden brown. Serve warm.
 |
| Here they are all rolled up |
 |
| ...and here they are with the butter and sugar on top! All ready to pop into the oven! |
 |
| YUMM!! |
A couple tips about this recipe...
Definitely try to serve warm, if possible. They taste even better when they’re a little warm!
Serve with ice cream! Yumm!
Like the recipe states, use tart apples. I don’t even know what kind of apples I used the first time around, I just picked them up at a farmer’s market. They didn’t have Granny Smith apples at the time and I don’t know my apples, so I just picked ones that were described as tart. Unfortunately, I didn’t think they were that tart once they were baked. This time, I used Granny Smith apples. I tried one out after they were baked because they looked really good and I couldn’t resist! to see if there was a difference, and there was definitely a difference! I liked them even more with the Granny Smith apples...they just differentiate the apple from the pastry a little more. So, I guess I would suggest using Granny Smith apples - not just any “tart” apple! :)
And on a side note...I have really been trying to work on my photography skills and have been enjoying food photography a lot! I'm having a lot of fun with it! So, I hope you enjoy the pics, too! ;)
Hope you enjoy the recipe and especially hoping you have a wonderful Thanksgiving Day!

Oh my giddy aunt, these look delicious and your photos are gorgeous!! I love the olive green background and design beneath...SO SHARP! Your blog is looking awesome, Alli! :)
ReplyDeleteThanks so much, Joy!! :)
Delete