}

Wednesday, July 18, 2012

This blog has moved!


Thank you to everyone who has followed me on this journey!  I feel that it’s time to make a fresh start with my furniture refinishing venture and, therefore, am excited to announce that I have moved to a new blog.  I would love for you to follow me over there!  Check out my new blog The Golden Sycamore where I’ll be sharing my furniture transformations and a little about our house updating progress!
Thanks again and hope to see you over at The Golden Sycamore!

Monday, July 2, 2012

DIY Chalkboard

I have been SO busy this past week!  My daughter and I were at church all week for VBS, we had company over for dinner on Tuesday night, and I had two appointments during the week!  Needless to say...we're tired!  Especially my daughter!

I finished up this chalkboard last week, but I finally had some time today to sit down at the computer and write up the blog post!  


I found this frame at a garage sale.  It was originally a mirror, but once I cleaned it up, I noticed a small scratch.  Sound familiar?  I obviously need to be more diligent about checking things out thoroughly before purchasing them!  Here it is fresh from the garage sale.


I didn't want to use it as a mirror even if the scratch was really small, so I took the mirror out and replaced it with hardboard.  We got a big sheet of it since I'm sure I'll be using more of it in the future!  


My husband  cut out the size I needed for my project (because I think he not-so-secretly enjoys helping me when it involves power tools!) and I sprayed it with spray primer.  I wasn't going to prime it, but the hubby thought the chalkboard paint would soak in too much on such a porous surface.  So, I decided to listen to his wisdom just this once and prime it!  Haha!


After two light coats of primer, I was ready for the chalkboard paint.  I used the paint you have to brush or roll on as opposed to the spray stuff.  No reason, really.  That's just what I used for my last chalkboard project and we had a ton left over, so that's what I used!  Here is the hardboard painted with chalkboard paint.


I used a foam brush when I painted with the chalkboard paint this time.  I will say, as you can see in the next picture, it does leave a texture to board.  I'm still debating on whether or not I like the texture.  I think if I knew I was going to sell a piece, I'd use a small roller to apply the paint for a smoother finish.  

After the paint dried for 24 hours (okay, maybe a little less!), I rubbed a piece of chalk all over the board.  See the texture come out?  Apparently you have to rub the chalk on and then wipe it off to make chalk work on it.  I don't know if that's true or not, but I've heard it so many times that I just do it every time now!


Next, I had to attach the chalkboard to the frame.  I tried wood glue at first, but it just didn't hold, so I tacked a few finishing nails into the back of the frame to hold it in there securely.  


I am hoping to eventually have a gallery wall on our living room wall filled with family pictures and I knew I wanted this to be included in it somehow.  But since this is the first piece, I don't know exactly where it is going to end up on the wall.  So, I used Command adhesives to hang it.  It's much better than using a nail, since I may end up moving it in the future.


I believe there are specific Command adhesives for picture hanging, but these are left over from a hook we had once used and they worked perfectly for this.  I may use the picture hanging strips for the rest of the pieces on the gallery wall, so that I can change them around if I want...and I won't have a bunch of holes in the wall!


I should add in here before I go too far, that I painted the frame with  Annie Sloan chalk paint in Provence and then used a coat of clear wax over that.  The frame does look a little distressed/dirty and that's because I was using dark wax on something else before I waxed this frame, so my brush had some dark wax on it already.  I'm okay with that, though!  I think it turned out nicely!


Now, on to the rosettes.  I already had made the canvas rosette for a different project, but ended up using it on this.  I put it on the frame and felt like it needed a little something extra, so I made the yellow one.  To make a rosette, first you cut (or rip) a strip of fabric.  This one is a little small, so the rosette turned out a little small.  The bigger you want your rosette to be, the bigger (longer AND thicker) you need to cut your fabric strip.


As you can see, the edges can be a little jagged.  It just adds to the character of the flower!  

Next, tie a knot in the end of the fabric strip.  Then you just start twisting the fabric and turning from the knot.  I don't have a picture of this part because my husband was sleeping at the time and I was working on this alone.


I kind of "winged" it as I went anyway, so a picture probably wouldn't do you any good!  I think it's good to wing it sometimes and just let it turn out how it's gonna turn out!  ;)

And here is my rosette!    


I used hot glue to keep the rosette together.  I just picked several places on the back and front to dab a little glue, held it for a couple seconds each time, and it held together just fine.  I also used the hot glue to attach the rosettes to the chalkboard frame.  Just a couple dabs and they were good to go!


Here are a couple shots of the final product.  


As you can see, it looks a little strange just hanging on the wall above our couch all by its lonesome.  But as I find more garage sale frames, I'll be adding to my gallery wall collection! 


Thanks so much for stopping by!  I really appreciate all the comments being left lately!  I'm definitely feeling loved!  :)  


I'm linking up to the following blogs to share my project!

Cherished Bliss - Craft and Tell
Today's Creative Blog - Get Your Craft On
Domestically Speaking - The Power of Paint Party
{Primp} - Primp Your Stuff Wednesday
Embracing Change - Creative Inspirations
Restore Interiors - Restored it Wednesday
Liz Marie Blog - Link Up With Me, Liz Marie
House of Hepworths - Hookin Up With HoH
Freckled Laundry - {air your laundry friday} Textile Party
The Shabby Creek Cottage - Transformation Thursday
Miss Mustard Seed - Furniture Feature Friday
Tatertots and Jello - Weekend Wrap Up Party

Wednesday, June 27, 2012

Magnetic Burlap Memo Board


I got this piece at a garage sale for $1.  Originally it was a mirror and I was intending to keep it that way.  Until I got it into the trunk of my car and realized that some of the mirror “treatment” was flaking off.   Here is the before shot.  

And here you can see the detail of where the mirror was flaking off.   


I saw it and immediately thought I had just spent one dollar on trash.  I’d just have to throw it away when I got home.  One for the “lesson learned” file.  

Well, somewhere between then and now I had a brilliant idea.  Why not try to take the mirror out and see if I can still use this cool frame for another purpose?  I thought about making it into a chalkboard, but had done a chalkboard recently and thought I should try something else.  When I went to the flea market a couple weeks ago I picked up some great burlap sacks (which I forgot to picture on that post).  I was thinking of using them for another project – and still am – but I thought about this frame that I didn’t know what to do with and it came to me to make a burlap memo board.  


After I took out the mirror, I painted the frame with Annie Sloan Chalk Paint in Emperor's Silk (red).  Then I painted over that in a light pink ASCP color, Antoinette.  Once the red color was totally covered and the paint was dry, I used a damp rag to rub off some of the pink paint in places.  It is a fun way of distressing that I've really enjoyed the most, I think.  It gives me freedom to make it look the way I want and I don't get a ton of "scratch" marks from using sand paper.


At first I was going to make it a cork board and use push pins, but I’ve never been a huge fan of push pins, so I decided to make it magnetic.  I bought a piece of sheet metal from The Home Depot and laid the burlap over it, but you could see the metal through it.  After wracking my brain, I came up with an idea.  We have these old, ugly, faded pillowcases on our guest bed that I absolutely hate, but haven’t been willing to replace.  Well, they just so happen to be the perfect color.  So, I cut one of the pillowcases in half and glued the sheet metal to it (which I had already glued to a piece of foam board to help stabilize it) and then wrapped the burlap around the whole thing and glued that down.  


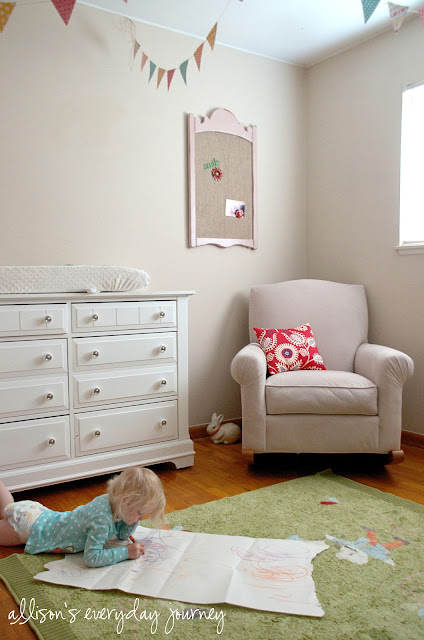
 Now you can’t see the metal and you can’t even tell that there is that thin piece of fabric behind the burlap.  AND, it’s not too thick that magnets won’t stick to it, which is what I was nervous about.  I am not selling this piece (unless someone is REALLY interested in it).  It is going in my daughter’s room which we are slowly changing over from a nursery to a big girl room.  This is the jumping off point along with the pillow I shared with you last week.  I think the memo board looks a little out of place where it is now, but I am not really sure how we're going to arrange the furniture once we're all done and I wanted to get this on  the wall now.  So, there it hangs...for now!


Thanks again for stopping by the blog today.  Sorry about such a long post!  I feel like I want to share my steps and thought process behind the pieces I create, but I don't want my readers to be bored by a long, dragged out post.  So, what do you think?  Should I keep my posts short and sweet or do you like me to explain what's going on in my head?!  Please leave me a comment with YOUR thoughts...and be honest.  I can take it!  :)


I'm linking up to the following blogs to share my project!

Cherished Bliss - Craft and Tell
Today's Creative Blog - Get Your Craft On
Domestically Speaking - The Power of Paint Party
{Primp} - Primp Your Stuff Wednesday
Embracing Change - Creative Inspirations
Restore Interiors - Restored it Wednesday
Liz Marie Blog - Link Up With Me, Liz Marie
House of Hepworths - Hookin Up With HoH
Freckled Laundry - {air your laundry friday} Textile Party
The Shabby Creek Cottage - Transformation Thursday
Miss Mustard Seed - Furniture Feature Friday
Tatertots and Jello - Weekend Wrap Up Party

Sunday, June 24, 2012

Two tiered end table

I’m so excited to share this table with you!  


It was looking pretty shabby when I picked it up at a garage sale a month ago.


The top really needed some help!


I am really loving the look of a stained top and try to do it on all the pieces with tops that are in good enough shape.  I think it lets the piece keep some of it’s previous life and still get a fun makeover!  For this piece, I used Dark Walnut stain by Minwax, the same stain I used for my first painting project.
I absolutely love the color!


The body of this table is done in Provence, an Annie Sloan Chalk Paint color.  It is such a fun color.  Very vibrant and cheery!


I also tried a new technique on this piece!  I taped off stripes on the drawer and dry brushed them in Old White by Annie Sloan.  It was my first time ever attempting dry brushing and I really like the way it turned out. 


I’m really starting to enjoy taking more risks and trying new things when I refinish these pieces.  I feel like it gives the pieces more personality than just being painted one color and doing nothing else with it.  I’m having fun with it and I feel more and more creative the more I use my creativity!  I love it!

Thanks for stopping by and checking out my latest project!  I'm still working on finding a way to sell my painted furniture, but once I figure that out, this piece will be for sale...or you can always contact me if you are interested in it.


I'm linking up to the following blogs to share my project!

Today's Creative Blog - Get Your Craft On
Domestically Speaking - The Power of Paint Party
{Primp} - Primp Your Stuff Wednesday
Embracing Change - Creative Inspirations
Restore Interiors - Restored it Wednesday
Liz Marie Blog - Link Up With Me, Liz Marie
House of Hepworths - Hookin Up With HoH
The Shabby Creek Cottage - Transformation Thursday
Miss Mustard Seed - Furniture Feature Friday
Tatertots and Jello - Weekend Wrap Up Party

Wednesday, June 20, 2012

I sewed my first pillow cover ... and Rylan’s big girl bedroom design ideas

This weekend I sewed my very first pillow cover.  I already had a pillow form that had an ugly cover on it, so I just made a new one!  My in-laws were here this past weekend and my mother-in-law helped me with the pillow cover.  She walked me through it and was there for me to ask questions of, but didn’t really do any of the work.  Which I’m really happy about.  I learn best by doing things myself and having someone there to bounce questions and ideas off of.

Here is the pillow!  

And here is the back.


I’m so happy with how it turned out!  As you can see in the backside picture, I made an envelope cover, and it was surprisingly easy.  I followed this tutorial which was very straight forward and easy to understand.
This pillow will go in my daughter, Rylan’s room.  She is 21 months old and we are starting to transition her to a “big girl” room.  I don’t know what the normal age is for that, but we feel like she’s ready.  We took the side off her crib two and a half months ago and she’s been doing great in it, so we think she’s ready for a big girl bed.  We just have to find the right one at a garage sale or something so that I can paint it and make it special just for her!  
Which brings me to the design scheme for her room.  I originally saw this first picture on Pinterest and just fell in love with the colors.


I think the dark pink in the inspiration might end up being red in Rylan's room, but I'm okay with that.

Here's another room I really liked!

I just love this color combination and I think we can make it work, in our own way, for Rylan’s room.
To start off, we have the fabric I used on the pillow which is called Shine On Americana by Waverly.  It has red, light blue, navy, and cream in it.  We’re just missing the pink.


waverly americana fabric

I think I’ll bring my swatch back to the fabric store one of these days and see if I can find some coordinating fabrics to go with it.  And I need to find bedding that brings everything together.  The fabric is always the hardest part for me.  I guess I get scared and overwhelmed by all the choices and I think I’m going to pick the wrong ones.  
What part of a room design is the hardest for you?  Is fabric easy for you to pick out or do you struggle with it like me?


I'm linking up to the following blogs to share my project!

Freckled Laundry - {air your laundry friday} Textile Party
it all started with paint - pillowpalooza link party

Sunday, June 17, 2012

My first custom order … more yellow!


If you remember my post about my flea market finds, you’ll remember this chair I found that day.  

While looking at the furniture in this particular booth, I found a chair I liked and considered buying, but I kept looking through the booth at the rest of the furniture for sale.  When I saw this beauty I fell in love with it.  It has so much character – much more than the first chair I had looked at and consequently passed on.  The legs on this chair are just so cute.  I knew I had to have it.  I asked the man selling it if he’d accept $10 less than the ticketed price and, to my surprise, he said yes!  I thought he’d haggle with me, but he just said yes!  I handed over my money and that baby was mine!
As I walked out of the booth with my new treasure tucked under my arm, my mother-in-law says “Would you be willing to paint that chair and sell it to me?”  Talk about an easy sale!  I was originally planning on painting and selling the chair anyway (although I’m still in search of a shop in which to sell my painted furniture), so the fact that I “sold” it 30 seconds after I bought it made me quite happy!  I showed my mother-in-law the Annie Sloan Chalk Paint colors and let her pick out which ever color she wanted.  She really liked Cream, so we went with that.  After some paint, a little distressing, and clear wax, it is ready to go to its new home! 


I love this chair and wish I had a place for it in my own home, it’s just so darn cute!  But, I suppose I can “visit” it at my in-laws’ house whenever I want!  ;)
Thanks for stopping by my blog to check out my latest project.
Hope you have a wonderful week!


I'm linking up to the following blogs to share my project!


Today's Creative Blog - Get Your Craft On
Domestically Speaking - The Power of Paint Party
Embracing Change - Creative Inspirations
Restore Interiors - Restored it Wednesday
Liz Marie Blog - Link Up With Me, Liz Marie
House of Hepworths - Hookin Up With HoH
The Shabby Creek Cottage - Transformation Thursday
Miss Mustard Seed - Furniture Feature Friday
Tatertots and Jello - Weekend Wrap Up Party

Monday, June 4, 2012

My very first flea market adventure

We’re in Minnesota this week spending time with my husband’s aunt and uncle on their 90 acre sheep farm, but I wanted to stop over and share my very first trip to the flea market with you all.  On Memorial Day weekend, I went to a flea market on the west side of the state with my daughter and my in-laws.  Although the temperature was somewhere in the low 90s that day, we had a great time and I found some fun pieces.
Here are a couple shots of the market.  It was absolutely huge and went on forever and ever!  We didn’t even see the whole thing that day!  After several hours in the hot sun, we just couldn’t take it anymore, so we eventually had to quit.  But I know I’ll be back someday!


And here is what I found at the market.  The price on the table was perfect, I just couldn’t pass it up!  And when I saw this little chair, I instantly fell in love.  The legs are just beautiful!  The seller said it was originally a vanity chair; that’s why the back is so low.  I love finding out the history behind pieces.  It makes it that much more special to me!  

This window was my first purchase of the day.  We actually already have an old window hanging above our bed, but I just really loved this one, too!  I picked it because it has those two “hangers” on the top.  Honestly, I’m not sure if they’re original or not - I don’t know what they would have been used for - but I thought it was perfect for hanging on a wall as we did in our bedroom, so I snatched it up!  


Lastly is this dresser.  A lot of furniture at the market was priced way above what I could afford - especially since I’m buying pieces to refinish, not to keep as they are.  I was getting pretty discouraged at times and figured by the time I got to a booth, all the well-priced pieces would be gone.  We walked by this booth and I saw this dresser and thought I’d pop in to see what outrageous amount they wanted for it.  To my surprise it was marked at a really reasonable price.  I was ready to buy it on the spot, but thought I’d ask if they could give me a better price on it.  No sense in paying more than you have to, right?  Well, I’m glad I asked because the seller came down $20 off the already affordable price!  I was so happy I whipped out my money and handed it over!  That thing was mine and I wanted to make it official as quickly as possible!  Haha!  


I’m so happy I went to this flea market and really had a great time looking around at everything, but I can’t tell you about my fun trip without giving a shout out to my in-laws, especially my father-in-law.  He was so sweet about hauling all my stuff to their vehicle and getting it all in there for me.  And did I mention it was over 90 degrees that day?!  Thank you Wayne and Terri for all your help!  I can’t express how much it means to me!

Nana, Papa, and Rylan at the Jenison Memorial Day parade


I can’t wait to show you the “afters” these great finds!
Take care!


I'm linking up to the following blogs to share my project!

Miss Mustard Seed - Furniture Feature Friday